

While assembling or buying a PC or laptop, we always need to take care of essential components that constitute a building block to make a stable, fast, and smooth-running computer in the long run. The critical computer parts that play a significant role are the motherboard, RAM, PSU, HDD or SSD & processor.
In this article, we will talk more about the type of processor, its significance, and how to check the processor in Windows 10 and its more details.
Usually, processor or CPU comes with different thread technology, i.e., during the early days of the computer, there used to a single-core processor that was attached to limited cache memory & frequency. As technology improved, the thread counts, and cache memory increased. These days, CPU with 38-cores with a big cache memory is available in Intel’s 10nm Ice Lake Xeon.
Steps to Check Processor Speed in Windows 10
- Check in System Properties
The easiest way to find a processor in Windows 10 is by looking at the system properties window. To enter the system properties window, users can either try a shortcut key by pressing Windows + Pause/Break button on the keyword at once. It will open the system properties window, the system properties window gives necessary information about computer components, like computer name, processor, Windows OS details, RAM, Windows activation detail, and many more.
Another shortcut can also access the system properties window typed in the Run window. It is a “control system”. This command will land end-user to the same system properties screen that can access in another way.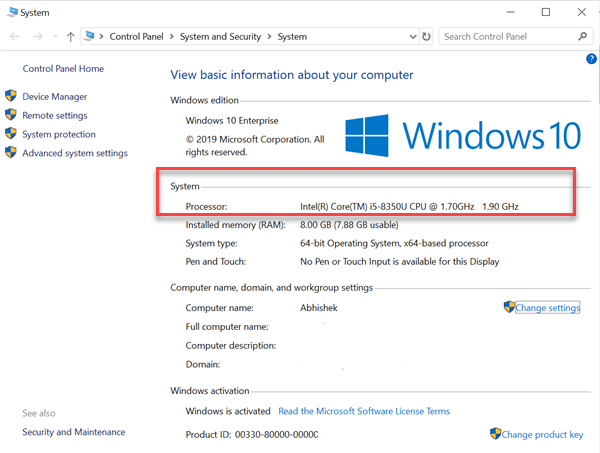
- Find out from Windows Settings:
The second way to see processor or CPU information is by going to Windows system settings.
Go to Start -> type settings -> enter
Select system -> About
About window under system settings displays other pieces of information like OS installation date and build number for current Windows 10.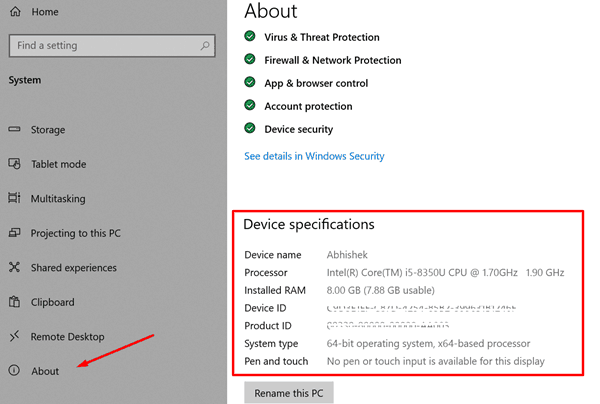
- DirectX Window Can Give More Information
DirectX Window is an advance screen where end users can see detailed information about not just CPU but complete pieces of information. Like Direct X version currently installed, system model number, system manufacturer, BIOS version, RAM installed, Page file size, and many more.
Search for ‘dxdiag’ in Windows 10 search.
That gives the information and speed of the CPU in Windows 10.
There are tabs available “Display”, “Sound”, “Input”, etc. that demonstrate information about current graphics configuration, name and manufacturer, type of display connected, and display memory available (VRAM).
VRAM is used in the case when a user is playing games, watching HD contents, etc., this is when VRAM of the computer is using, it helps to improve the efficiency of the display content and rendering of high-quality material.
Direct X diagnostic window also gives information like the current version of the driver installed for driver, current sound card settings, and its driver version details. And input information from all connected devices on the computer that is attached to the PC.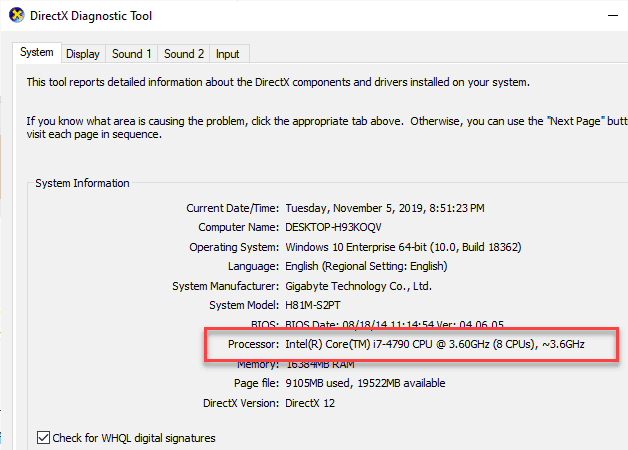
- From MSInfo32
MSInfo32 or also called system information is a one-stop interface to get information related to any hardware or software component configured on the computer. MSinfo2 gives information related to different features of CPU that are supported or not.
Features like virtualization and its working depend upon CPU; if installed CPU doesn’t offer support for hyper-threading technology, virtualization technology, then it won’t work. Virtualization software like VMWare; Windows Hypervisor won’t work on the computer. This information in detail can be access from the system information Window.
To access MSInfo32, press and hold
Window + R key on the keyboard. It will open a run Window, type “msinfo32” and hit enter.
MSInfo32 is also used to create a system report, i.e., in case of system problem user can forward system information to respective vendor to diagnose any software/driver fault and suggest recommendation.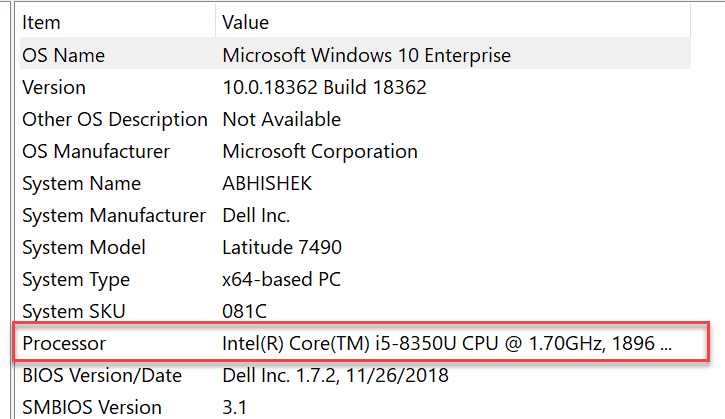
- Let’s Use the Windows 10 Task Manager:
CPU information can also be accessible from the task manager screen, by pressing and holding CTRL+SHIFT+ESC key on the keyboard together or by pressing CTRL+ALT+DEL keys on the keyboard and selecting Task Manager -> Performance tab.
The Performance tab gives information like current CPU utilization, speed, threads, or processes that are active/running: the total uptime since the computer started, virtualization support, and cache memory status.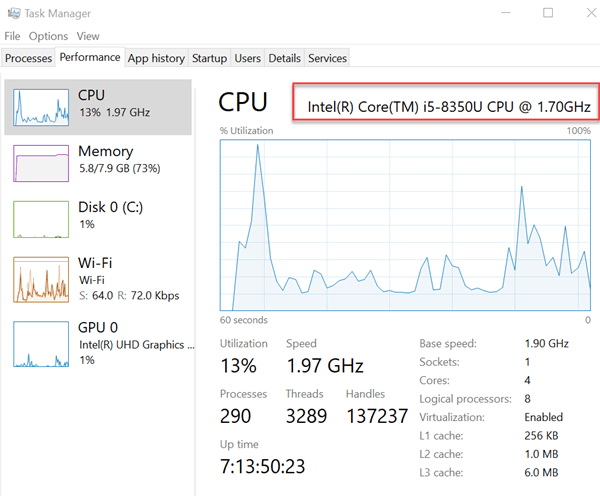
- System Information using Command Prompt
Finding system information using a system command line is yet another way to find details about system properties. System properties are displayed crisply and transparently and can easily be understood to be end-user.
To access system information using command prompt, go to Start -> Type command prompt -> right click -> run as administrator -> yes.
It will open the command line window, were type “systeminfo” -> enter. The system will scan for all connected peripherals and will display the system properties in a crisp and concise order.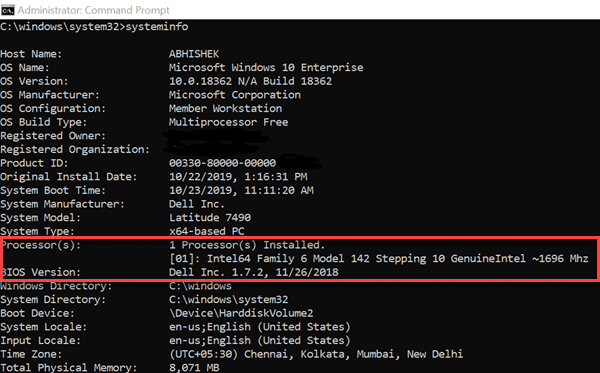


Third-Party Tools:
CPU-Z:
CPU-Z is an award-wining third-party tool that allows end-user to view processor information in detail. Like the name of the processor, code name, chipset technology (14nm), or (7nm) or (10nm), Core Voltage information. Specification of CPU, which contents information like clock speed, Instructions that talk about features supported by that processor, which includes Virtualization technology.

On other tabs, the tools also show information’s like clock speed of the processor, the cache memory utilized, and their division.
Cache memory stores detail those are needed immediately, for example, when an item is copied to the clipboard, doing a copy-paste operation, when an extra boost is required to complete a task. The primary objective of cache memory is it acts as a buffer or fast memory to reduce time to access information or data from the main memory.
HWInfo:
Just like CPU-Z, HWInfo is another more robust system monitoring tool that provides information about anything on the computer. It runs a scan on launch and tells you details like power consumption of different components connected to the computer. It also provides information like power draw by individual CPU core, GPU memory, and its architecture and many more. A small pop-up screen demonstrates load on a single core next to the HWInfo screen.

We have answered most of the ways on how to check processor in Windows 10. Above are a few ways to find system property and processor information. Do let us know which method you liked the most and easy to use in your comments below.


